In solutions where the iASP and Single Sign On (SSO) is configured the challenge is to set the synchronization of the Enterprise Identity Mapping (EIM) between Prod and DR nodes. Such replication is done via Tivoli Directory Server. This mechanism is not easy to set up, difficult to manage and monitoring. Unfortunately this the only solution what IBM provides (officially). In this article I provide the procedure how to simplify it.
I’ve been asked several times – “Is it possible to store SSO configuration on the independent ASP” and forget about Tivoli replication? Yes, it is possible. It simplifies EIM synchronization a lot. Why? – Because only one EIM DB is stored on the iASP. Therefore, if the system fail-over to DR location, exactly the same DB shows up on the other side. Read below how to do it.
In this post I will not describe how to configure SSO from the scratch. I try to cover this in another post some day in future. Below you find only information how to move/configure SSO/EIM configuration to the iASP.
It is recommended to have SSO already working on Prod and DR machines. Because the process of creating Kerberos tickets doesn’t change. This part is still done thru the REALM. If you have the REALM already configured, there is no need to modify it.
Next fact which you need to consider. All EIM configuration will be lost during this implementation. So, just to remind what EIM is. The Enterprise Identity Mapping (EIM) is a database which stores relation between LDAP user account and IBM i userID. For instance LDAP user bgrabowski from domain ibm.com is linked with IBM i userID bartg. Therefore, if you have such database already built, and you will move it to the iASP with this manual, this information will be lost. You have to either, enter all relations manually thru the GUI or develop a simple green-screen program which would list all your existing EIM entries to a file, and another custom program which add the entries to the EIM. Unfortunately, there is no native command to do so, and you need to develop the programs by yourself. Can you use export/import function from the Tivoli Directory Server? Good question but I don’t know, because I tried several times and it always failed.
Second thing which needs to be considered. Once the SSO configuration will be moved to the iASP, it can work only when the iASP is available. Therefore, you can’t use SSO if the iASP is varied off. This limitation comes from the fact that all *DIRSRV configuration is stored on the iASP, and STRTCPSVR SERVER(*DIRSRV) fails if the configuration is not available.
If you are familiar with the risk, we can starts with the procedure.
- Create EIM configuration on the iASP
In this step we will destroy existing EIM configuration and create a new one on the iASP.
Make sure the iASP is Varied On and accessible for use.
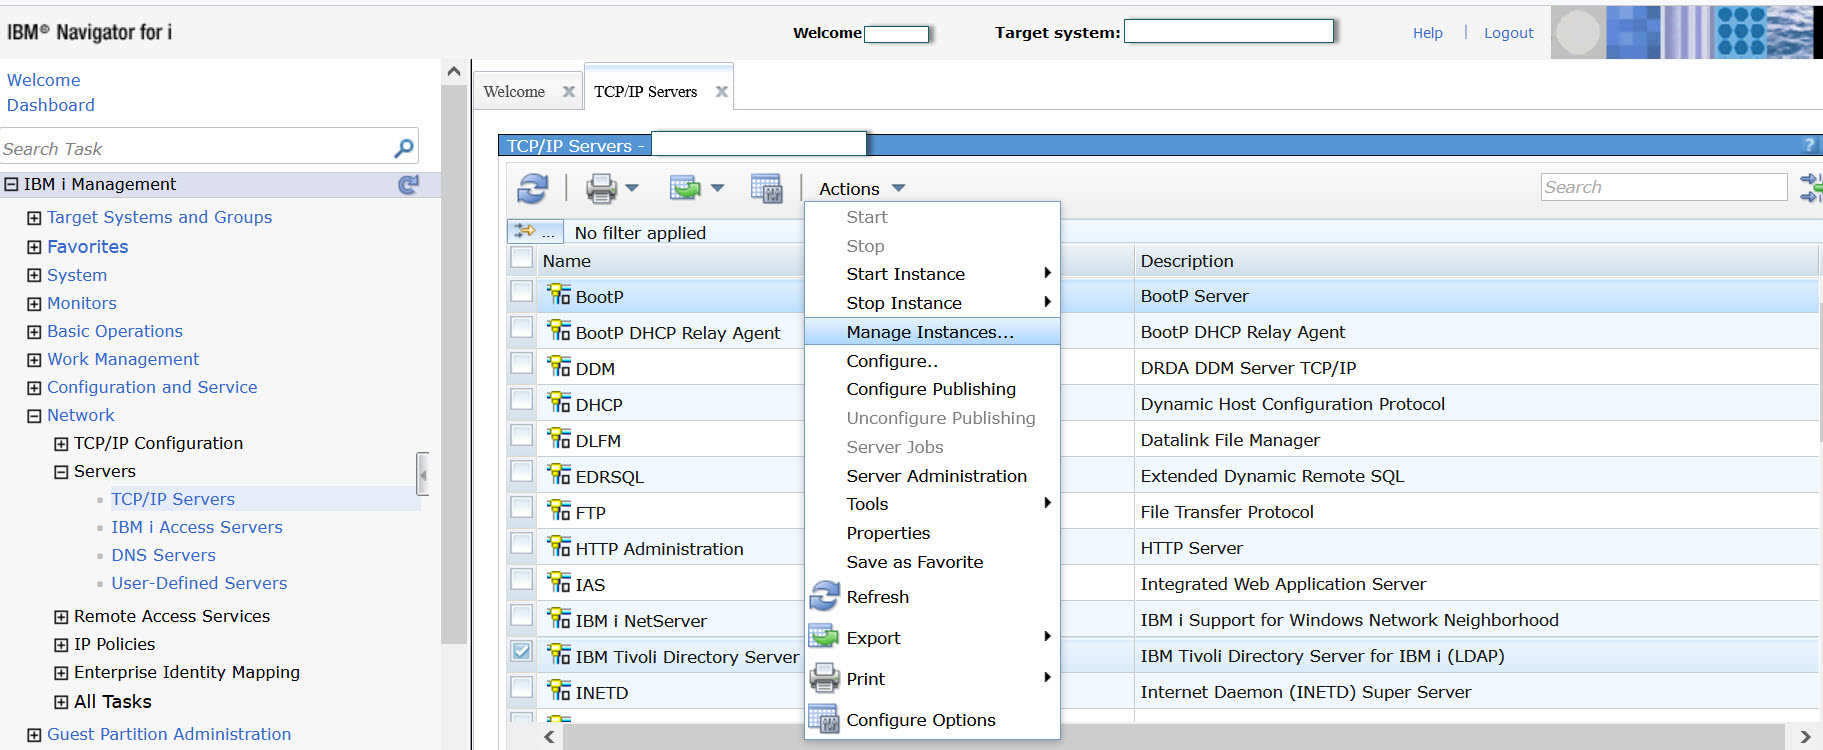
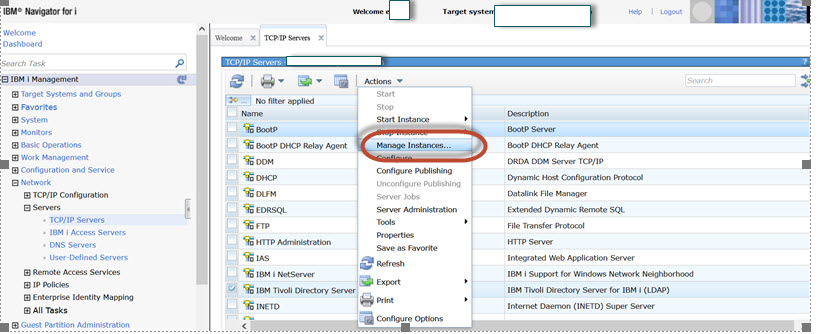
a) Stop *QUSRDIR server -ENDTCPSVR SERVER(*DIRSRV) and Open Navigator for i and go to Network -> Servers –> TCP/IP Servers –> Select Tivoli Directory Server for IBM i and take option Manage Instances
b) Select Delete against Qusrdir

c) Verify if QUSRDIR libraries were deleted. There should be none
WRKLIB QUSRDIR* – no library should exist
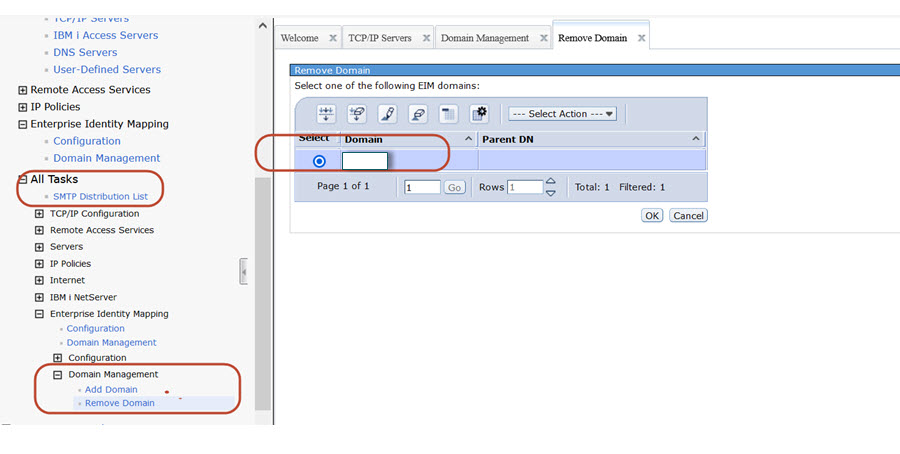
d) Check if EIM Domain is still shown, if yes delete it. Go to Network -> Enterprise Identity Mapping -> All Tasks -> EIM ->Domain Management -> Remove Domain. Select the Domain and click OK.
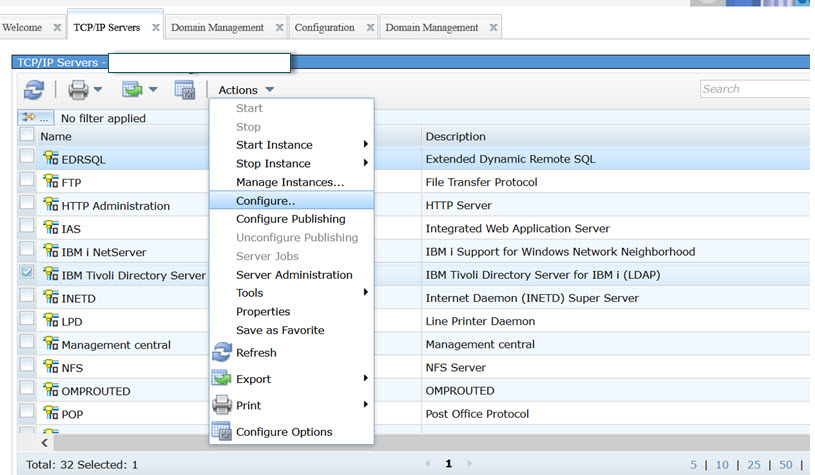
e) When the entire QUSRDIR configuration is deleted. We can start to perform the configuration from the scratch. Network -> Servers –> TCP/IP Servers –> Select Tivoli Directory Server for IBM i and take option Configure.
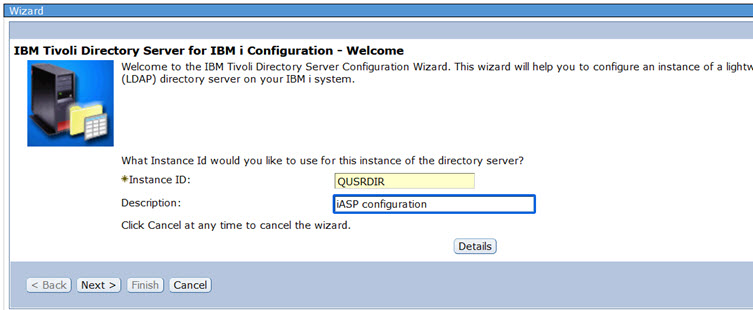
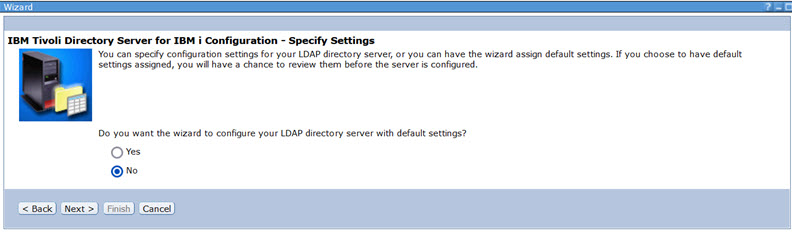
f) We need to complete several windows in the configuration wizard. Type in some description and click Next.
g) Select No, for default configuration.
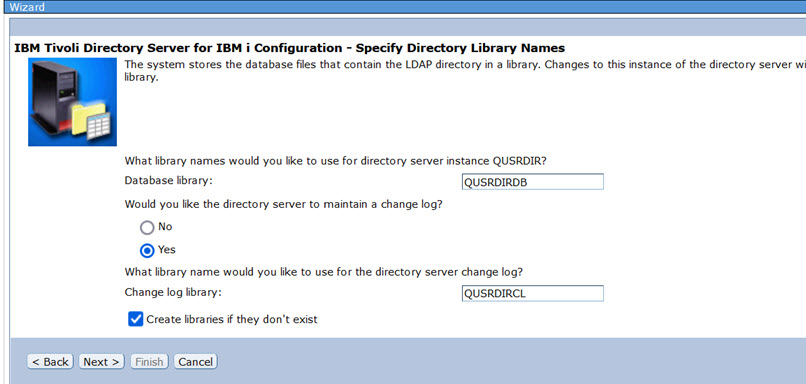
h) Select Yes for maintain a change log. However, it is not required.
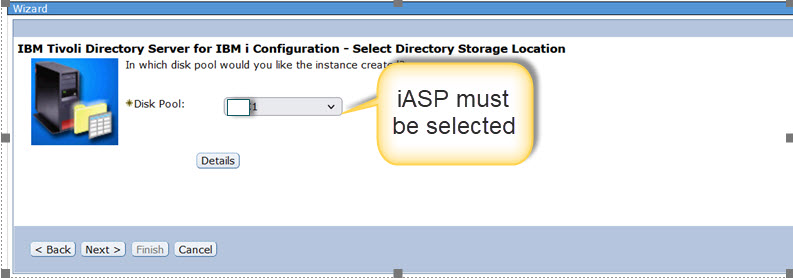
i) Now, in the drop down list you should see the independent ASP available in your system , if it is not on the list, make sure that it is Varied On. Select the iASP from the drop down list and click Next
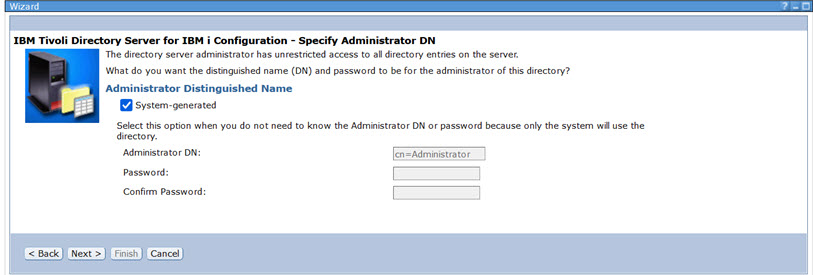
j) Leave default parameters, and click Next
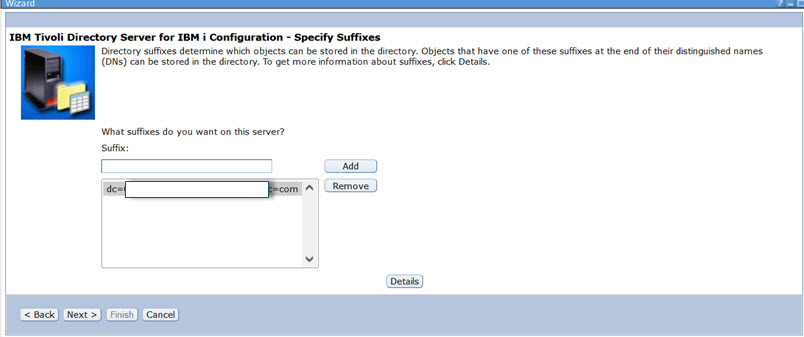
k) The Domain Controller specification should be shown from the local node. Leave it default and click Next.
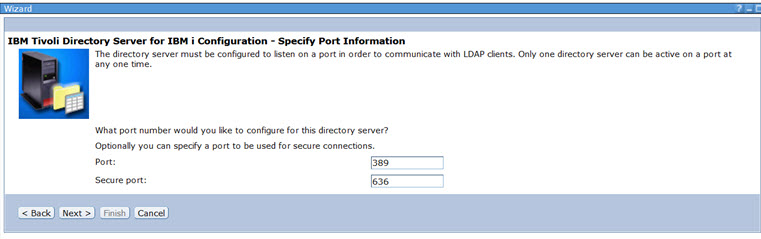
l) I suggest to leave the port configuration as default. So, leave default port settings, and click Next.
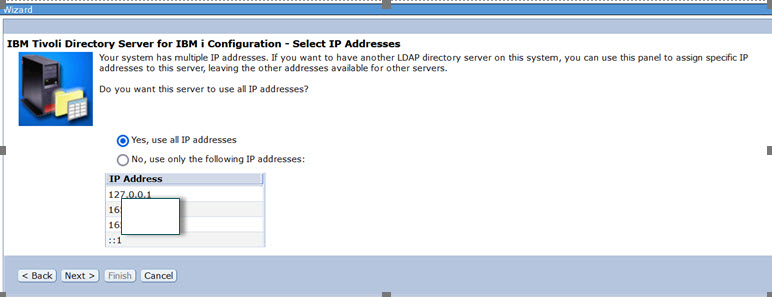
m) I suggest to use select all IP addresses, and click Next.
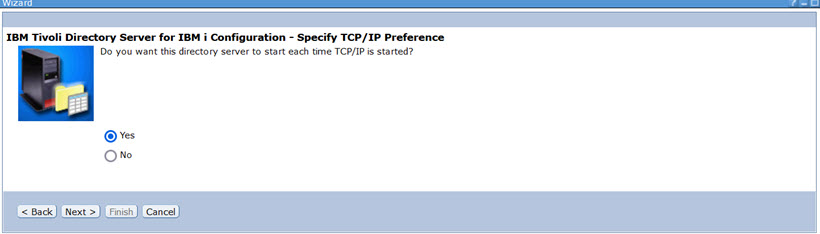
n) You can leave Yes for automatic start, but QUSRDIR will not start unless the iASP will be varied on. It is recommended to add command STRTCPSVR SERVER(*DIRSRV) to a CL which will be called after the iASP is Varied On.
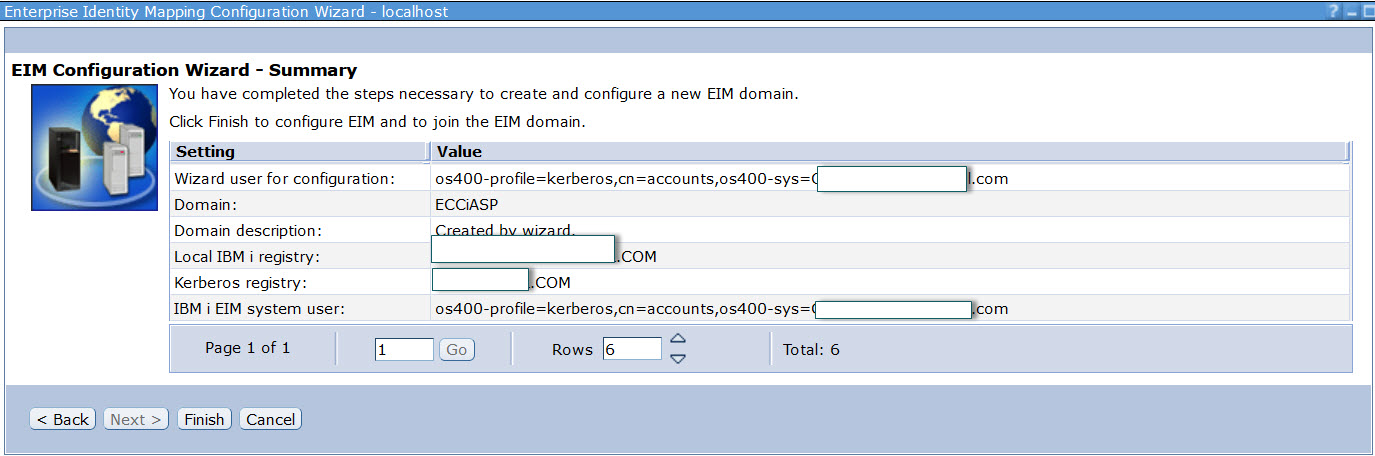
i) Now, you see the wizard summary screen. Verify all parameters and click Finish.
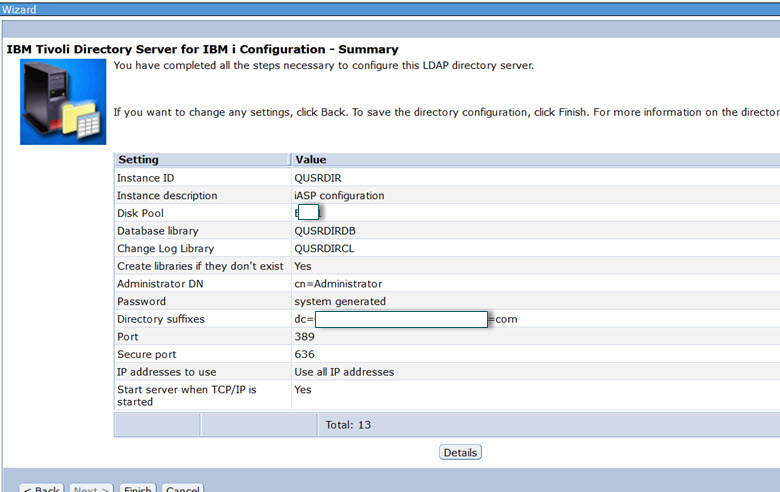
j) If everything goes well, you should get Success information.

k) You can now verify that all configuration libraries are stored on the iASP, they should be as shown below.
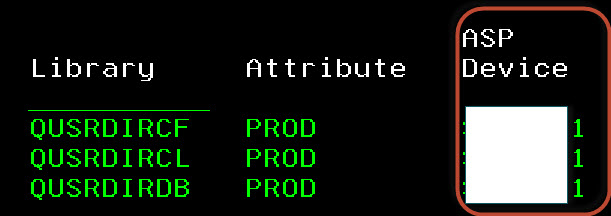
Excellent, we finished configuration of QUSRDIR on the iASP. From now on, all setup, configuration will be stored on the iASP. Which give us the opportunity to flip over the configuration.
2. Creating EIM Domain on the local server
In the previous section we have created the configuration on the iASP. In this section we will create the EIM Domain.
a) From Navigator for i, Go to Network ->Enterprise Identity Mapping -> All Tasks -> Enterprise Identity Mapping -> Configuration -> Configure -> Create and join a new domain
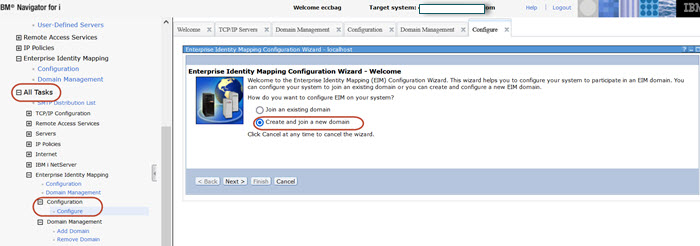
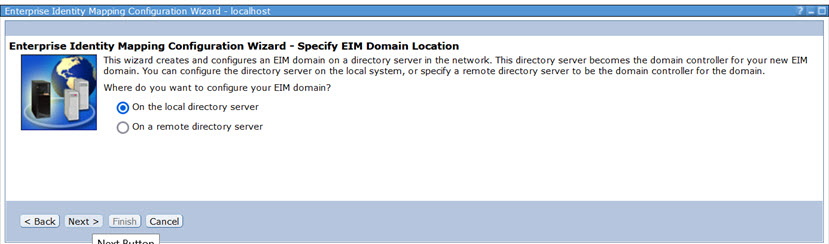
b) Select On the local directory server and click Next
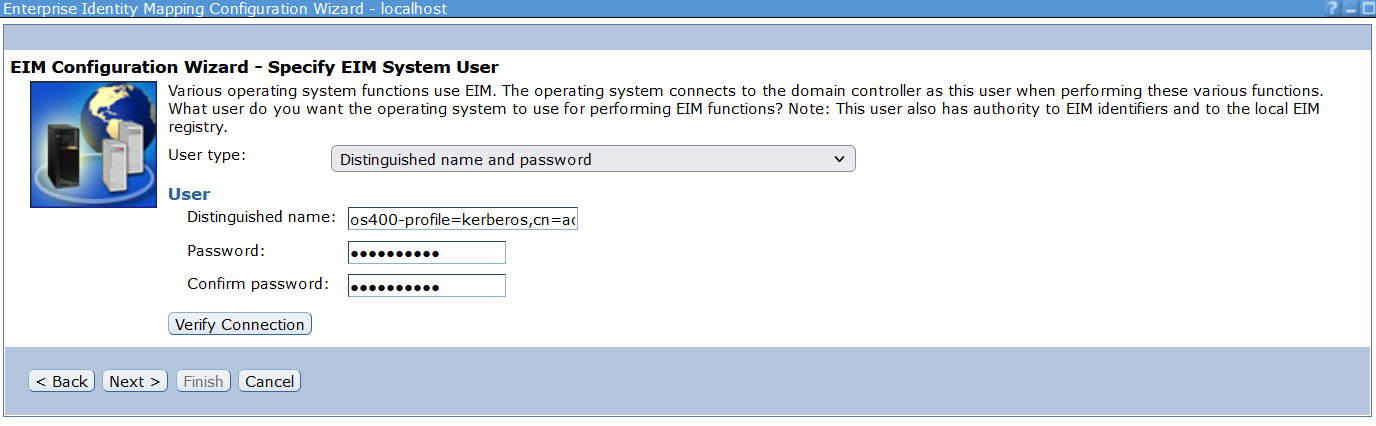
c) From time to time, there are different windows open for this configuration step. I’ve seen few times a window when an user could be specified only in “Distinguished name” format, and the drop down list is not available. If this is your case, close the Configuration tab, and start the process from step a again.
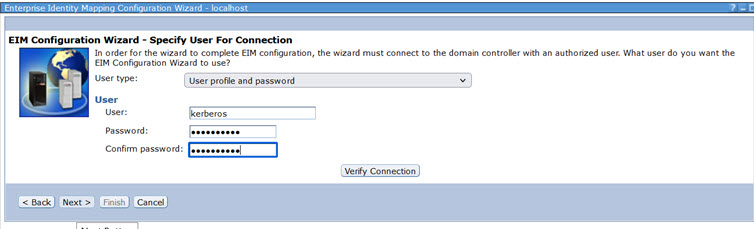
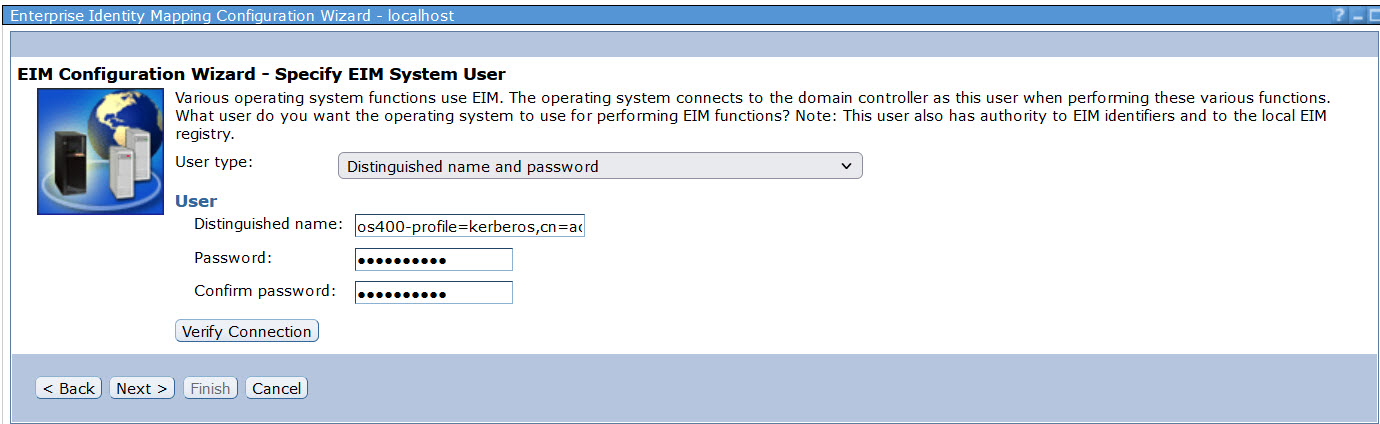
Specify user which will be used for EIM mechanism. This USRPRF should be the service account, which will not be deleted. During the configuration process this USRPRF requires special authorities *ALLOBJ, *IOSYSCFG , and a password. For instance, you can use your administrator account, but if one day your user profile will be deleted, Single Sign On would stop working. This is why you should use a service account which will never be deleted.
Remember that, after initial configuration of the EIM, the special authorities *ALLOBJ and *IOSYSCFG can be removed from the profile.
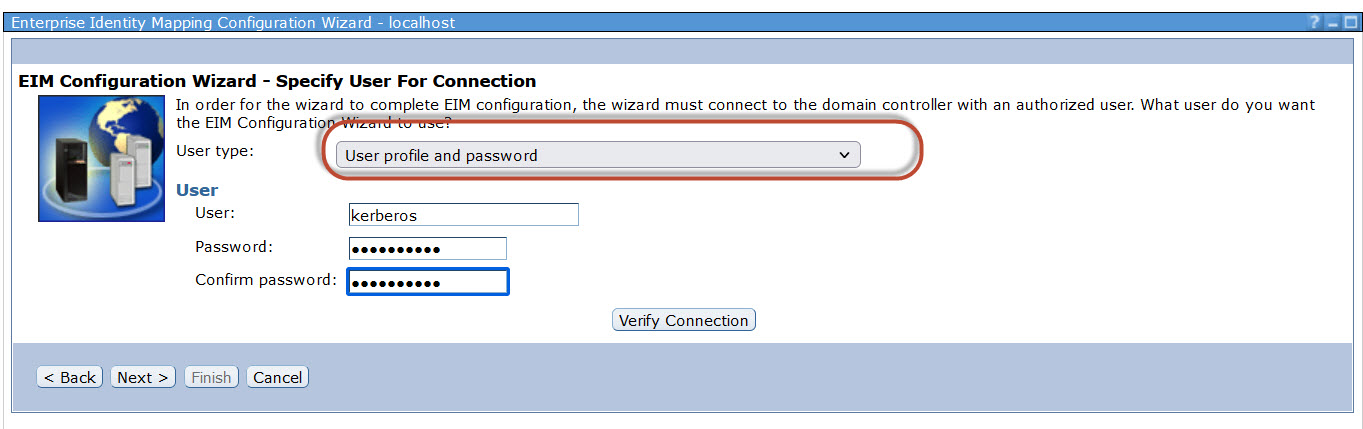
From the drop down list “User type” select “User profile and password” type in an user profile and the password.
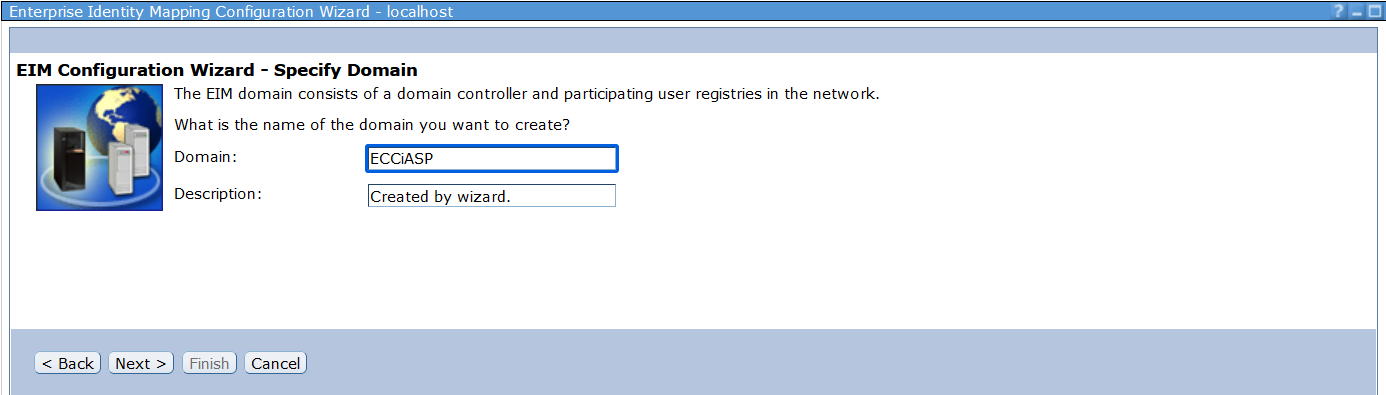
d) Add a name which identify EIM Domain, and click Next.
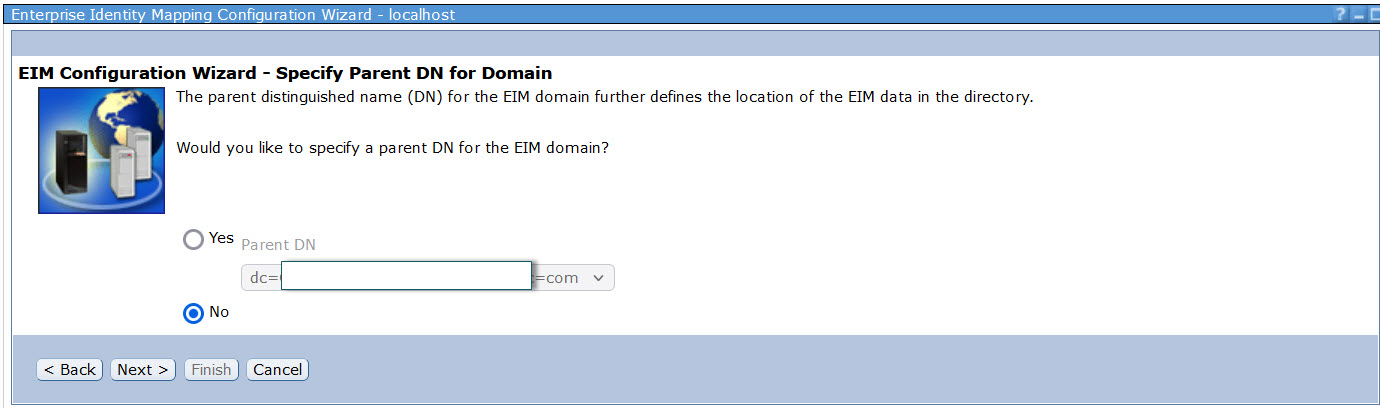
e) Select No for a parent DN , and click Next.
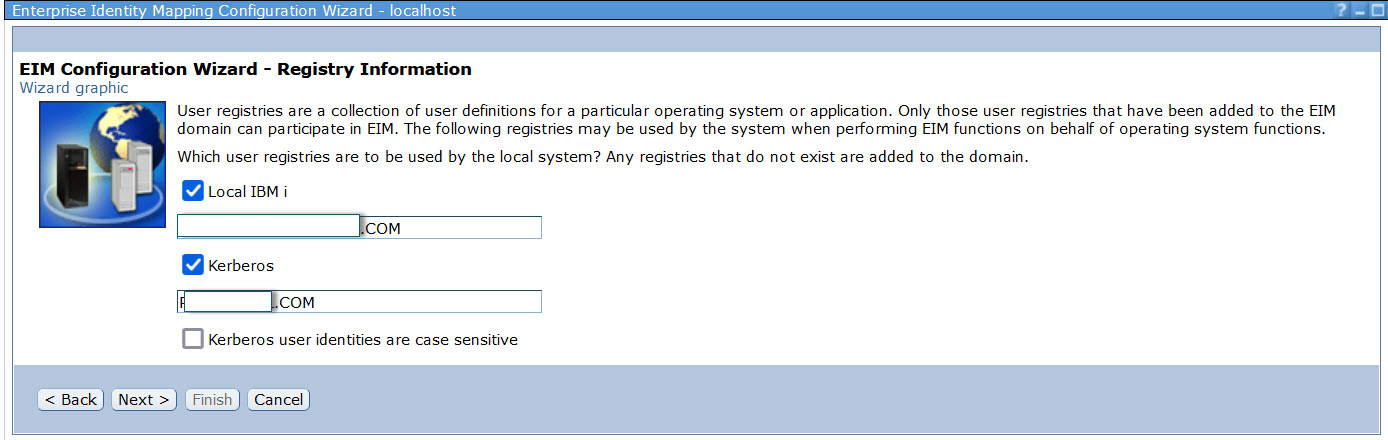
f) Now, you should see Active Directory Domain (where LDAP user account exists), and Domain related to IBM I (which should be same as IBM i Domain Controller.
g) Verify the userID which will be used by SSO engine. Do not change anything and click Next.
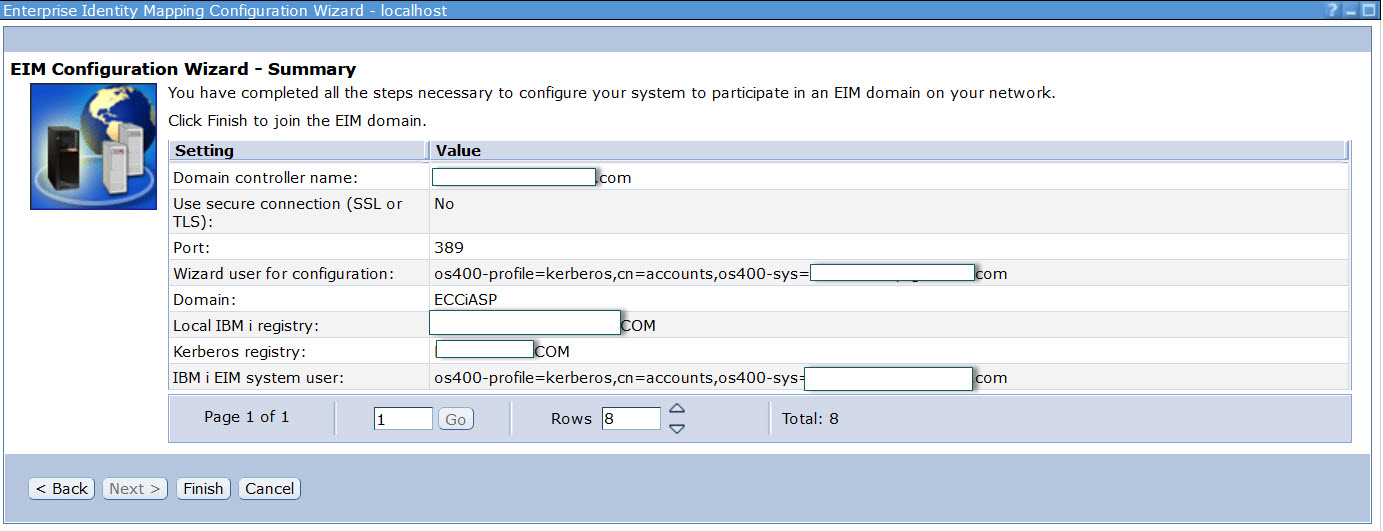
h) Verify information on the summary screen, and click Finish.
This should create EIM Domain and start QUSRDIR server. You can check in the QSYSOPR if following message appeared. “IBM Tivoli Directory Server instance QUSRDIR started successfully”. The Single Sign On is configured, but there is still missing information which would link LDAP userID with IBM i userprofile. This will be done in next section.
3. Create EIM association
In the section we will create association between LDAP user profile and IBM i userID. If you are familiar with SSO configuration already, there is nothing unusual. However, I suggest to configure at least one user in order to check an overall SSO functionality.
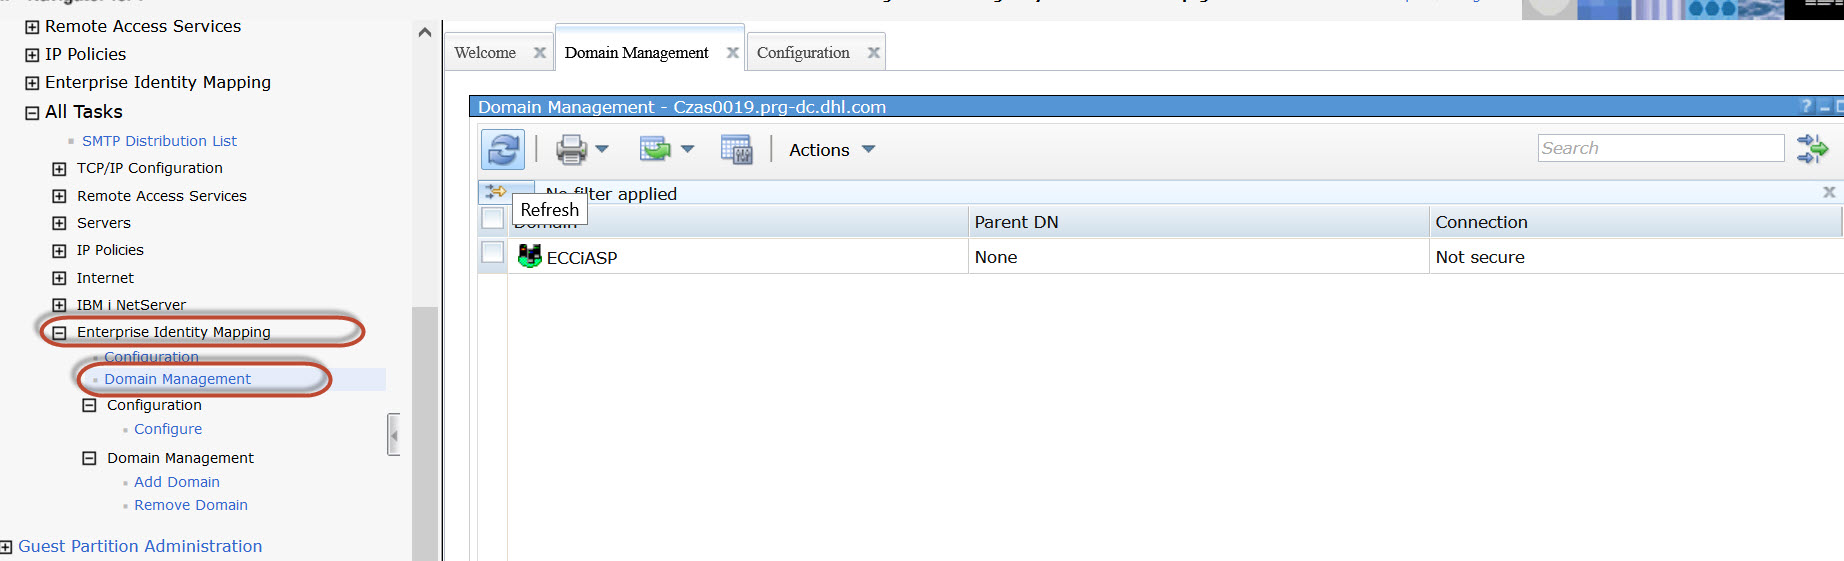
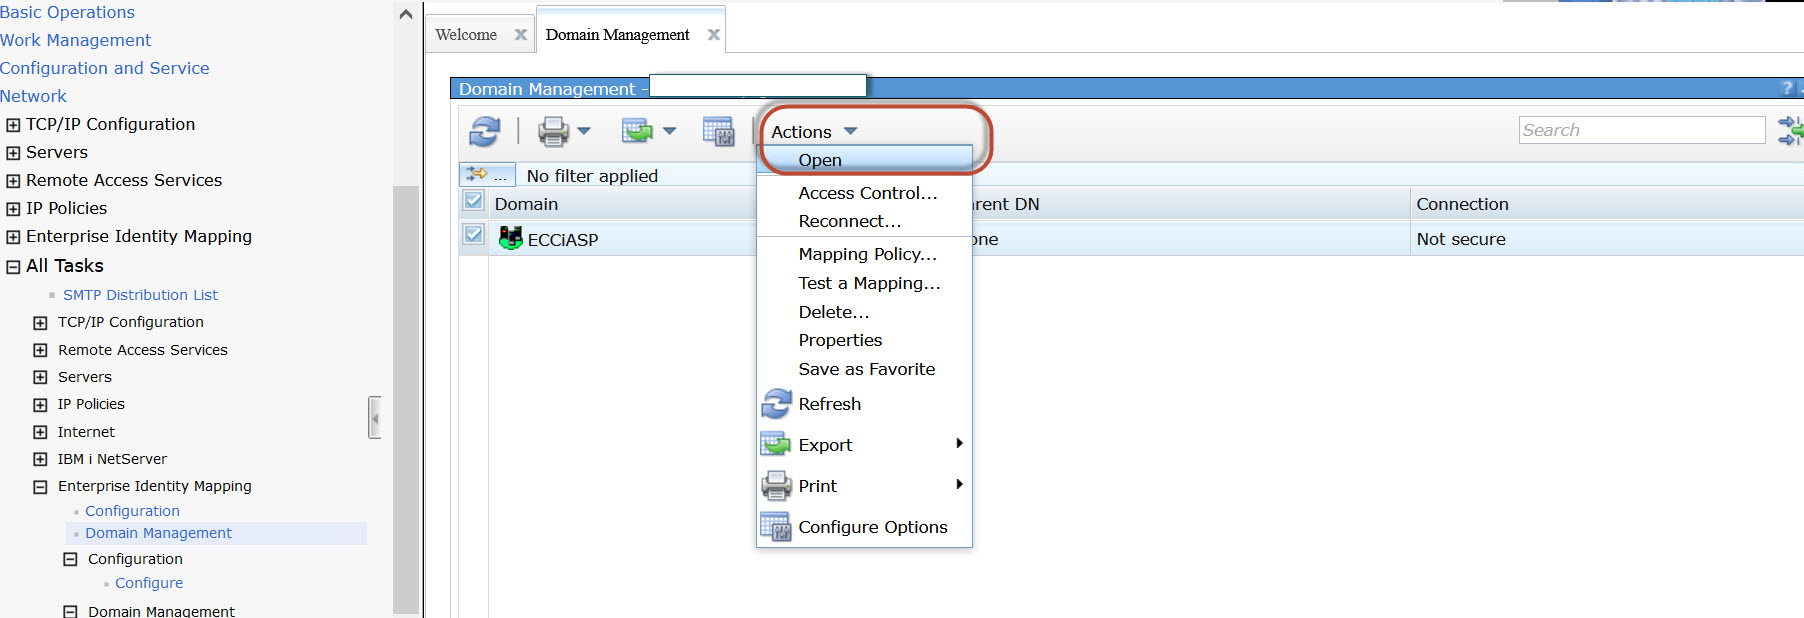
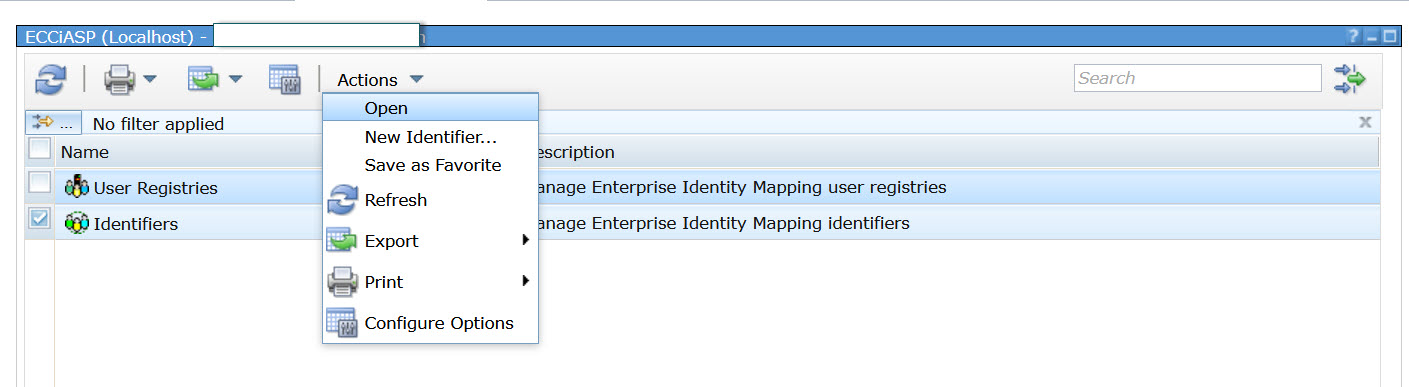
a) Go to Network ->Enterprise Identity Mapping -> All Tasks -> Enterprise Identity Mapping -> Domain Management. I hope you can find EIM Domain which we created in the previous section, if not click refresh button. The Domain icon should be green. Select the Domain (the icon must be green), and take option Actions and Open.

b) Select Identifiers , Actions and New Identifier
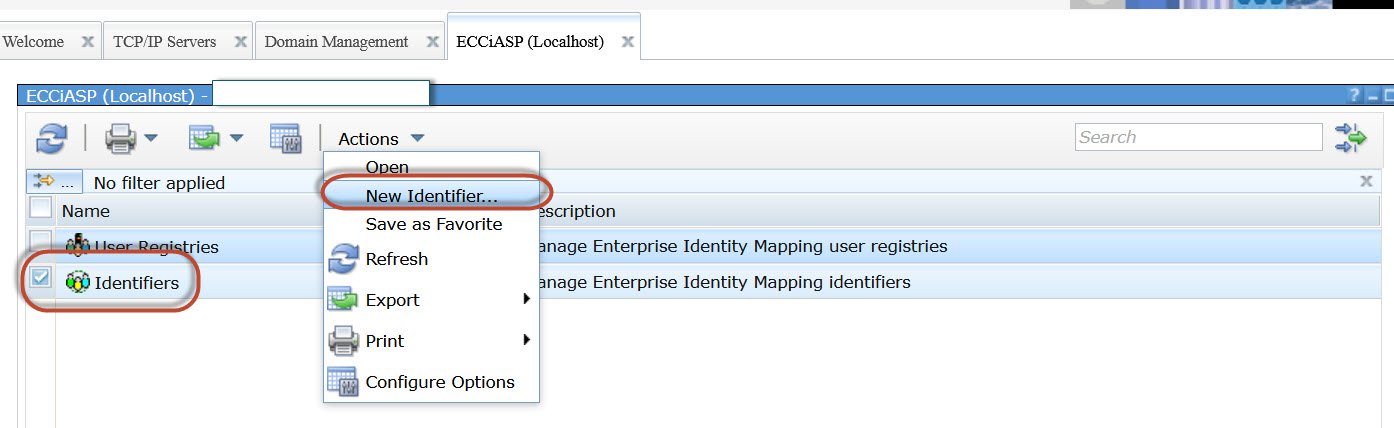
c) Type some name for identifier (it can be anything, but it should be somehow related to userID)

d) Click on Associations and click Add.

e) Select Association type and from the drop down list take Target and enter IBM i userID. (UserID which exists on IBM i LPAR) in the User filed. For the Registry – select the “Domain” which exists on your IBM i (it should be the same as Local Registry Name in step h in previous section).

f) You should see one record (target relation) added now. We need to add the source relation now. Click Add

g) Add LDAP user name in the User field. For the Association type select Source. For the Registry, click Browse and select AD Domain name, it should be the same name as in step h in previous section under Kerberos registry. Click Ok

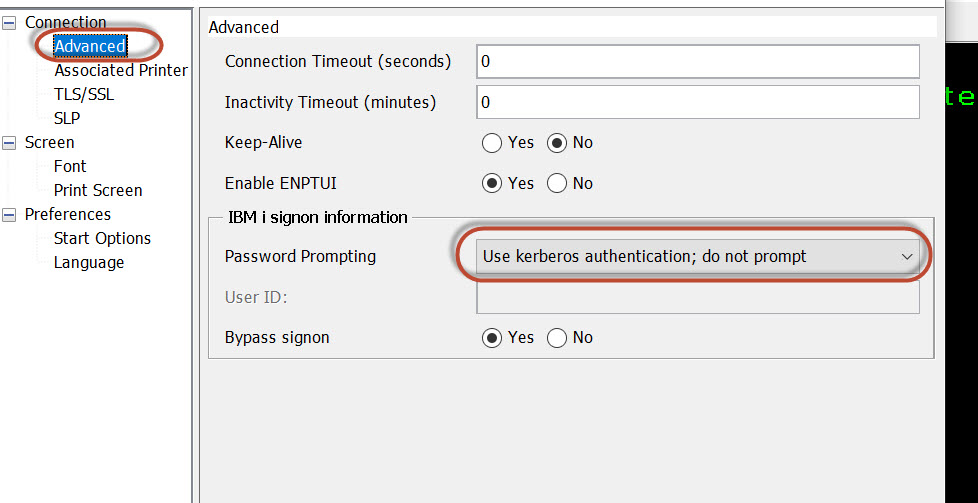
From now, Single Sign On should work. Take your ACS session, modify the configuration. From the menu Communication -> Configure -> Connection -> Advanced -> Password Prompting – User kerberos authentication; do not prompt
4. Configure EIM on the DR node
This section covers steps needed to configure EIM Domain on the DR node. It is necessary perform the iASP switch over to the DR node, and start the replication. The DR node will act as a different Domain Controller.
a) Stop TCP/IP *QUSRDIR server and Open Navigator for i and go to TCP/IP configuration -> Servers – TCP/IP Servers – Manage Instances
b) Select Delete against Qusrdir
c) Verify if QUSRDIR libraries were deleted. There should be none
WRKLIB QUSRDIR* – no library should exist
d) Check if EIM Domain is still shown, if yes delete it. Go to Network -> Enterprise Identity Mapping -> All Tasks -> EIM ->Domain Management -> Remove Domain. Select the Domain and click OK.
e) When the entire QUSRDIR configuration is deleted. We adjust QUSRDIR configuration. On the DR node, go to Navigator for i and go to Network -> Servers –> TCP/IP Servers –> Select Tivoli Directory Server for IBM i and take option Manage Instances
f) Click Regenerate List

g) This is the most important step of this entire procedure. The result must be exactly as shown below. If the messages is “0 Directory Server instances have been successfully added into the instance list.” the DR configuration wasn’t added to the EIM DB. In such situation do following:
- Vary off the iASP on the DR node
- Go to Network -> Servers –> TCP/IP Servers -> IBM Tivoli Directory Server -> Manage Instances -> and Delete QUSRDIR again.
You may see an error that configuration wasn’t find, so just ignore it. Once, this is completed, perform again steps from a to f and click Regenerate List. The result must be exactly as shown below.

h) After Directory Server instance has been added, click Start All.

5. Connect DR node to the existing EIM Domain
In the section the existing EIM Domain will be connected to DR node. EIM Domain already exists because we created it in section 2.
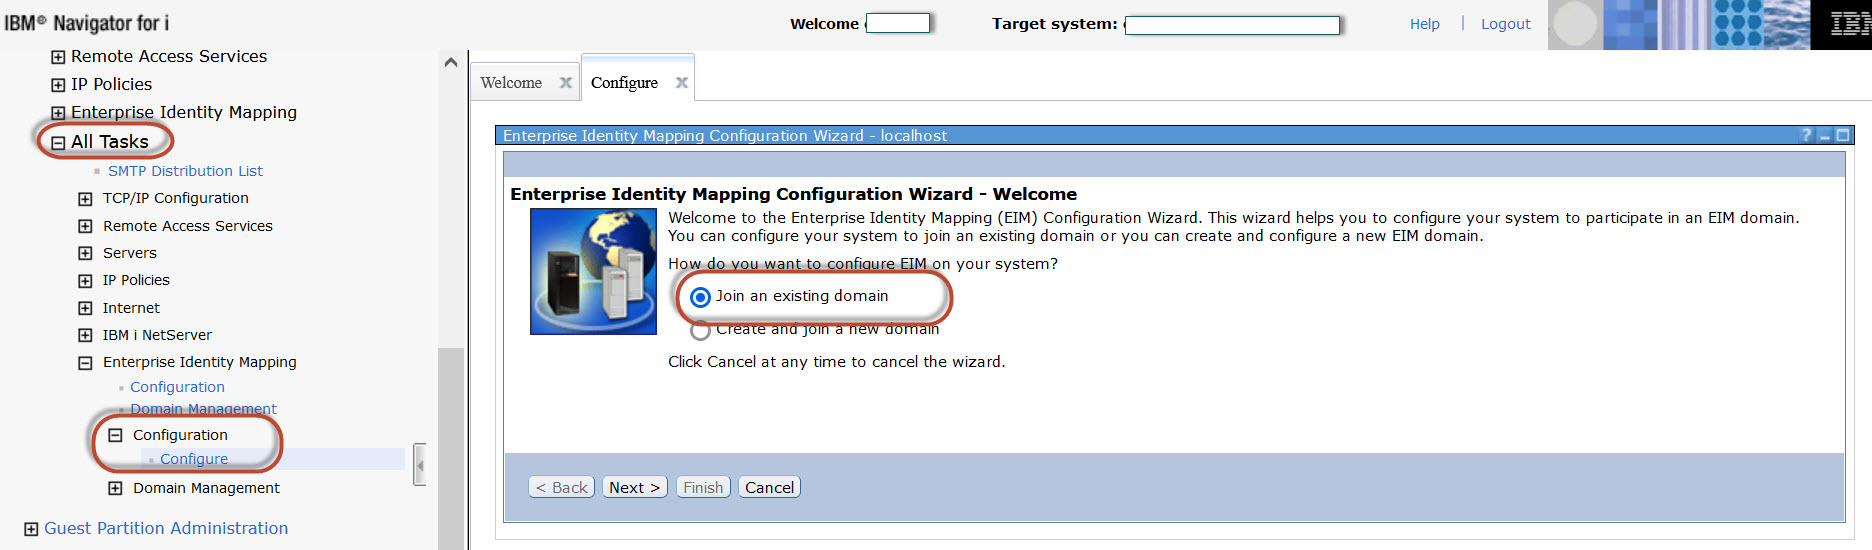
a) Start QUSRDIR job, and go in Navigator for i go to Network -> All Task -> Enterprise Identity Mapping -> Configuration -> Configure. Select Join an existing domain and click Next
b) The hostname of the DR node should appear in the Domain controller name field, leave all values as default and click Next.

c) For User type field take drop down list select User profile and password and enter userID which exists on the DR node. It should be a service user account, which will not be deleted.
d) The EIM Domain should appear, exactly the one which we created in section 2 . Select the Domain and click Next

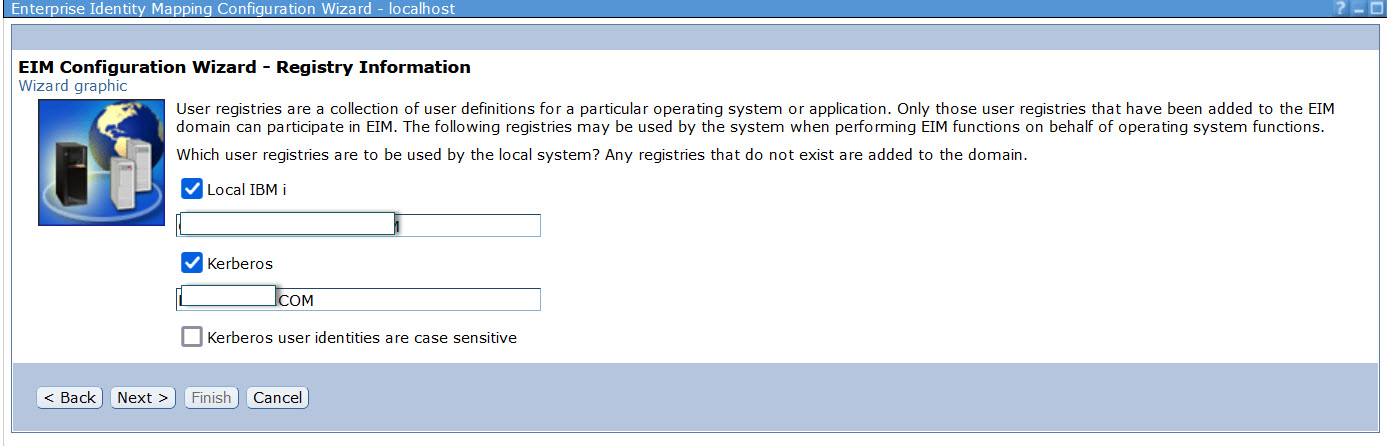
e) Verify names for two registries which will be configured. Local IBM i – the registry of the DR node, and Kerberos – LDAP AD registry. Make sure that both are selected and click Next.
f) Verify the service user ID which will be used for EIM and click Next.
g) Verify all parameters, if everything is correct click Finish.
I hope everything went fine, and the DR node successfully added the EIM Domain. You can check it in Navigator for i, go to Network -> All tasks -> Enterprise Identity Mapping -> Domain Management
6. Add EIM association for DR node
In the section we will enhance the existing EIM entry by another “target” account. The entries should already exist because we created one of them in section 3. We will modify the existing entry “Bart” with another IBM i account associated with different Registry – the registry which belong to DR node.
a) Go to Network ->All tasks -> Enterprise Identity Mapping -> All Tasks -> Enterprise Identity Mapping -> Domain Management. Select the Domain and click Actions and Open. I hope you can find EIM Domain which we created in the previous section, if not click refresh button. The Domain icon should be green. Select the Domain (the icon must be green), and take menu Actions and click Open.
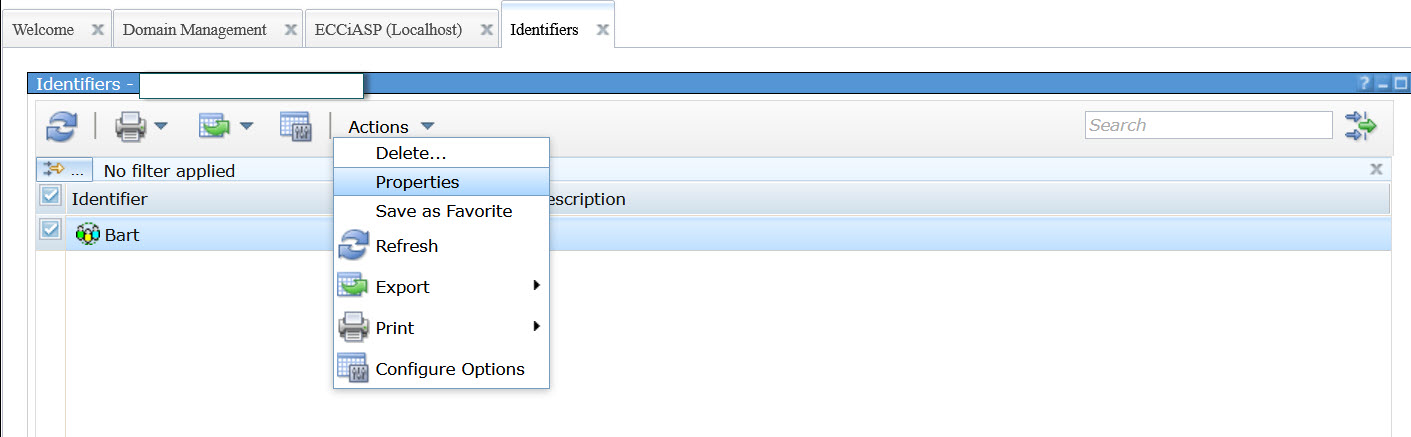
b) Select Identifiers , go to menu Actions and click Open
c) Select the identifier which you want to update ( in my example Bart), go to menu Actions and click Properties.
d) On the left side, click on Associations, this should show already existing entries for LDAP and IBM i UserIDs. Click Add on the bottom.
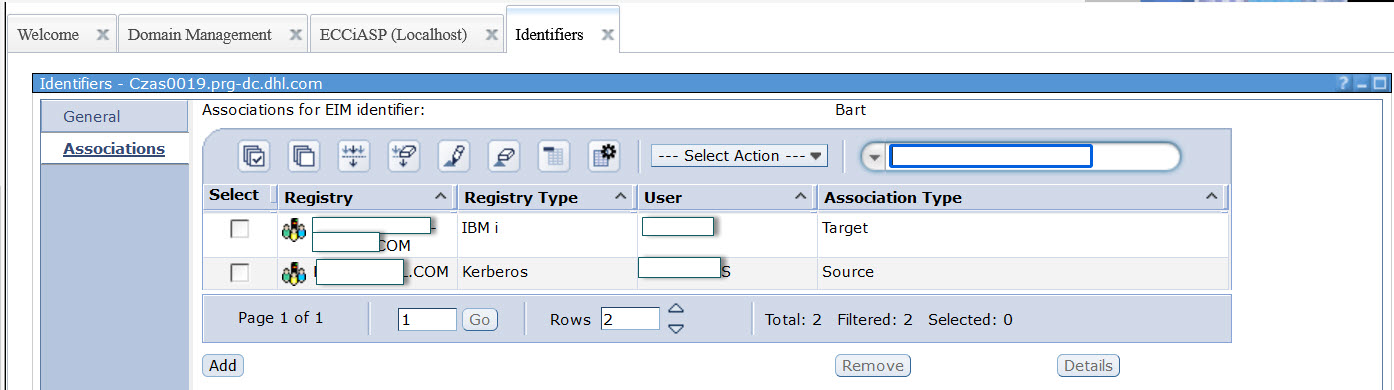
e) Select the Registry which represents DR node, and type IBM i userID which exists on that node. Make sure that Association type Target is selected.

f) On the summary screen you should see 3 entries. 2x association type Target which represents IBM i UserID, and one source which represents LDAP userID in Active Directory. If everything is correct, click OK.
You can try to login with SSO to your DR node, I hope that everything works for you.
The configuration is ready for Prod and DR node. Right now you can switch the iASP back to the production node, and all the setup remains. When new identifiers will be added to the EIM on Prod or DR node, make sure that both registries with both userIDs are added for each account. As I wrote before, the best is to develop a green screen interface where all the fields can be entered, because do it with the GUI is very insufficient.
If you have problems with the setup you can reach me using Contact form.
